
Block walls have long been a popular choice for residential, commercial, and industrial construction projects. Known for their durability and cost-effectiveness, block walls provide a sturdy foundation for fencing, retaining walls, garden enclosures, and property boundaries. However, to ensure the longevity and aesthetic appeal of these structures, it is essential to finish them properly. One crucial finishing touch that often gets overlooked is the use of cement caps. Cement caps not only provide a protective layer to the block wall but also enhance its overall appearance.
This article offers a comprehensive guide on cement caps for block walls. We’ll delve into the purpose of cement caps, the different types available, their benefits, installation techniques, and tips for maintenance. Whether you’re a DIY enthusiast or a professional contractor, understanding the importance and installation of cement caps can help ensure your block wall stands the test of time.
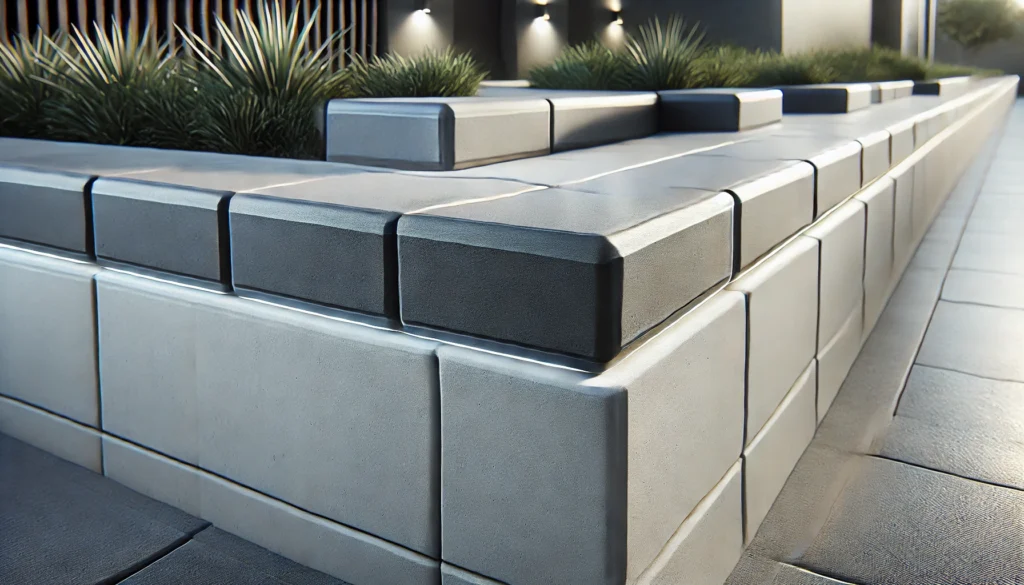
What Are Cement Caps?
Cement caps, also known as block wall caps or masonry caps, are horizontal concrete or cement-based coverings placed on top of block walls. These caps serve both functional and aesthetic purposes, providing protection from weather elements and adding a finished, polished look to the wall. Cement caps are commonly used on walls made from concrete blocks, bricks, or other masonry materials. They can be pre-cast or custom-made during the construction process.
The main purpose of cement caps is to protect the core structure of the block wall. By sealing the top of the wall, these caps prevent water, debris, and other environmental elements from seeping into the wall, which can cause structural damage over time. Additionally, cement caps help to distribute the weight more evenly across the wall, adding extra stability and reducing the risk of damage from shifting or movement.
The Purpose of Cement Caps for Block Walls
While block walls are inherently durable, they are also susceptible to damage from environmental factors like water, wind, and temperature fluctuations. The top surface of the wall is particularly vulnerable to these elements, as it is often exposed directly to rain, snow, and UV rays. Installing cement caps on top of the block wall helps mitigate these risks in several key ways:
1. Protection Against Water Damage
One of the primary functions of cement caps is to prevent water infiltration. When rainwater accumulates on the top of a block wall, it can seep into the joints and crevices between the blocks. Over time, this moisture can lead to efflorescence (the white powdery residue often seen on block walls) and freeze-thaw damage, where water trapped inside the blocks expands and contracts with temperature changes, causing the blocks to crack or weaken. Cement caps act as a barrier that prevents water from penetrating the top of the wall, ensuring the integrity of the structure.
2. Enhanced Structural Stability
Cement caps help distribute the weight of the wall more evenly across its surface, reducing the risk of cracking or shifting. This added stability is particularly important for taller block walls or those subject to heavy loads, such as retaining walls. By capping the top of the wall with a solid cement layer, the risk of structural movement due to shifting soil or external forces is minimized.
3. Improved Aesthetic Appeal
Beyond their functional benefits, cement caps also play an important role in improving the appearance of a block wall. The top of a block wall can often look unfinished or rough, especially if the blocks are uneven or the mortar joints are exposed. Cement caps provide a smooth, finished surface that enhances the overall visual appeal of the wall. They can be designed to match the style of the wall or complement the surrounding architecture, adding a polished, professional look to any masonry project.
4. Prevention of Pest Infiltration
Cement caps can also help prevent pests, such as insects and small rodents, from burrowing into the cracks and crevices at the top of the block wall. By sealing the wall with a solid cap, homeowners and property managers can minimize the risk of pests using the wall as a nesting or hiding place.
Types of Cement Caps for Block Walls
There are several types of cement caps available, each offering unique advantages depending on the specific needs of the project. Below, we’ll explore the most common types of cement caps used for block walls:
1. Pre-Cast Concrete Caps
Pre-cast concrete caps are pre-formed in a factory setting and then transported to the construction site for installation. These caps are typically made from high-strength concrete and are available in various shapes, sizes, and styles. Some of the benefits of pre-cast caps include consistency in size and finish, as well as ease of installation.
Pre-cast concrete caps often feature decorative elements, such as chamfered edges or rounded tops, which can enhance the overall appearance of the wall. They are a popular choice for both residential and commercial applications due to their durability and aesthetic flexibility.
2. Custom Poured Caps
Custom poured caps, also known as cast-in-place caps, are made by pouring cement directly onto the top of the block wall. This method allows for more customization, as the caps can be formed to match the exact dimensions of the wall and any specific design preferences. Custom poured caps are ideal for projects where unique or irregular wall shapes are involved.
While this method offers more flexibility in terms of design, it requires careful craftsmanship to ensure a smooth, even finish. The curing process must be monitored closely to prevent cracking or uneven settling.
3. Stone or Brick Caps
In some cases, block walls are capped with stone or brick rather than concrete. These caps offer a more traditional or rustic look and are often used to complement the design of the property or surrounding landscape. Stone caps are particularly popular for garden walls, outdoor seating areas, and retaining walls, where aesthetics are a key consideration.
However, stone and brick caps may not provide the same level of moisture protection as cement caps, and they often require more maintenance to prevent weather-related wear and tear.
4. Composite Caps
Composite caps are made from a mixture of materials, including concrete, resin, and synthetic fibers. These caps are lightweight, durable, and resistant to environmental factors like UV radiation and moisture. They are often used in areas with extreme weather conditions, as they are less likely to crack or fade over time.
Composite caps are available in a wide range of colors and finishes, making them a versatile option for both residential and commercial block wall projects.
Installation Process for Cement Caps
Installing cement caps on a block wall is a relatively straightforward process, but it requires attention to detail to ensure a secure and lasting fit. Below, we outline the general steps involved in installing pre-cast or custom poured cement caps on a block wall:
Step 1: Prepare the Surface
Before installing the cement caps, it’s important to prepare the top surface of the block wall. This involves cleaning the surface to remove any dirt, debris, or loose mortar that could interfere with the adhesion of the cap. In some cases, the top of the wall may need to be leveled with a layer of mortar to create a flat, even surface for the caps to rest on.
Step 2: Measure and Cut the Caps (If Necessary)
For pre-cast caps, it’s essential to measure the length and width of the wall to ensure that the caps fit properly. If the pre-cast caps are too long or wide, they may need to be cut to size using a masonry saw. Custom poured caps, on the other hand, are formed in place, so no cutting is required.
Step 3: Apply Mortar or Adhesive
Once the caps are measured and cut (if necessary), a layer of mortar or construction adhesive is applied to the top of the block wall. This layer serves as the bonding agent that holds the caps in place. It’s important to use the correct type of mortar or adhesive based on the material of the caps and the block wall.
Step 4: Place the Caps
With the bonding agent in place, the cement caps can be carefully positioned on top of the block wall. For pre-cast caps, it’s important to leave a small gap between each cap to allow for expansion and contraction due to temperature changes. These gaps are later filled with mortar or sealant to create a watertight seal.
For custom poured caps, forms are typically used to shape the wet cement as it is poured onto the wall. The forms are removed once the cement has cured, leaving a smooth, finished cap.
Step 5: Seal the Joints
After the caps are in place, the joints between the caps are sealed with mortar or a flexible sealant. This step is crucial for preventing water from seeping into the gaps between the caps, which could lead to damage over time.
Step 6: Allow for Curing
If custom poured caps are being installed, the cement needs time to cure before the wall is fully complete. Curing typically takes several days, depending on the weather conditions and the type of cement used. It’s important to keep the surface moist during the curing process to prevent cracking or shrinkage.
Maintenance and Care for Cement Caps
Once cement caps are installed on a block wall, regular maintenance is necessary to ensure they continue to provide protection and maintain their appearance. Below are some tips for maintaining cement caps:
1. Inspect for Cracks
Over time, cement caps can develop small cracks due to exposure to weather elements and temperature fluctuations. Regularly inspect the caps for any signs of cracking or damage. Small cracks can often be repaired with a masonry sealant, while larger cracks may require professional repair.
2. Clean the Surface
Cement caps can accumulate dirt, debris, and stains over time. Periodically clean the surface of the caps with a mild detergent and water to keep them looking their best. Avoid using harsh chemicals or pressure washers, as these can damage the surface of the cement.
3. Reapply Sealant
The sealant used to fill the joints between the caps can degrade over time, especially in areas with extreme weather conditions. Reapply sealant as needed to prevent water from seeping into the wall.
4. Protect from Heavy Loads
While cement caps are durable, they can be damaged by heavy loads or impacts. Avoid placing heavy objects on top of the caps, and take care when using tools or equipment near the wall.
Benefits of Cement Caps for Block Walls
Installing cement caps on block walls offers several key benefits, both functional and aesthetic. Some of the main advantages include:
1. Extended Wall Lifespan
By protecting the top of the block wall from moisture infiltration and environmental damage, cement caps can significantly extend the lifespan of the wall. This makes them a cost-effective investment for homeowners and property managers.
2. Improved Water Drainage
Cement caps often feature sloped or rounded surfaces that promote water runoff, preventing water from pooling on the top of the wall. This helps to minimize the risk of water damage and erosion.
3. Enhanced Aesthetic Appeal
Cement caps provide a finished, professional look to block walls, enhancing the overall appearance of the property. They can be customized to match the design and style of the wall, adding a touch of elegance to both residential and commercial projects.
4. Increased Structural Stability
Cement caps help distribute the weight of the wall evenly and prevent movement or shifting. This added stability is especially important for retaining walls and other load-bearing structures.
Conclusion
Cement caps for block walls are an essential finishing touch that provides protection, stability, and aesthetic value. Whether you’re working on a residential garden wall or a commercial retaining structure, adding cement caps can enhance the durability and appearance of the wall. From pre-cast concrete caps to custom poured options, there are a variety of styles and materials available to suit the needs of any project.
By understanding the installation process, maintenance requirements, and benefits of cement caps, you can ensure that your block wall remains strong and attractive for years to come.
FAQs
- What are cement caps used for on block walls?
- Cement caps protect the top of block walls from water infiltration, environmental damage, and pest entry while also providing a finished appearance.
- What types of cement caps are available?
- Common types of cement caps include pre-cast concrete caps, custom poured caps, stone or brick caps, and composite caps, each offering unique benefits depending on the project.
- How do I install cement caps on a block wall?
- The process involves preparing the surface, applying mortar or adhesive, positioning the caps, sealing the joints, and allowing for proper curing.
- Do cement caps help prevent water damage to block walls?
- Yes, cement caps prevent water from seeping into the block wall, reducing the risk of moisture-related damage like cracking and efflorescence.
- How often should I inspect or maintain cement caps on a block wall?
- Cement caps should be inspected regularly for cracks or damage, cleaned periodically, and resealed as needed to ensure long-lasting protection.
- Are custom poured cement caps better than pre-cast caps?
- Custom poured caps offer more flexibility in terms of design and fit, but pre-cast caps are more consistent and easier to install. The best choice depends on the specific needs of the project.
4o